
Keeping your camera lenses clean is essential for producing sharp, high-quality photos. Over time, lenses accumulate dust, dirt, fingerprints, and smudges that can degrade image quality. However, cleaning camera lenses improperly can potentially damage sensitive optical coatings or internal mechanics. In this post, we’ll outline the proper techniques and materials needed to safely and effectively clean camera lenses.
Lens Cleaning Materials
Before cleaning lenses, you’ll need the right tools and supplies. Avoid using household materials like paper towels, tissues, or compressed air which can scratch coatings. Some essential lens cleaning materials include:
- Lens cleaning solution – A non-abrasive, ammonia-free cleaning solution helps dissolve and lift dirt and oils. Optical lens cleaning fluids are generally safe for all lens elements and coatings.
- Lens cleaning wipes – Pre-moistened lens cleaning wipes or lens tissues are very convenient for basic cleaning on the go. Look for wipes specifically designed for camera lenses.
- Canned air – A can of compressed air helps gently blow loose dust and particles off lens surfaces without contact. Tilt the can away from the lens when spraying.
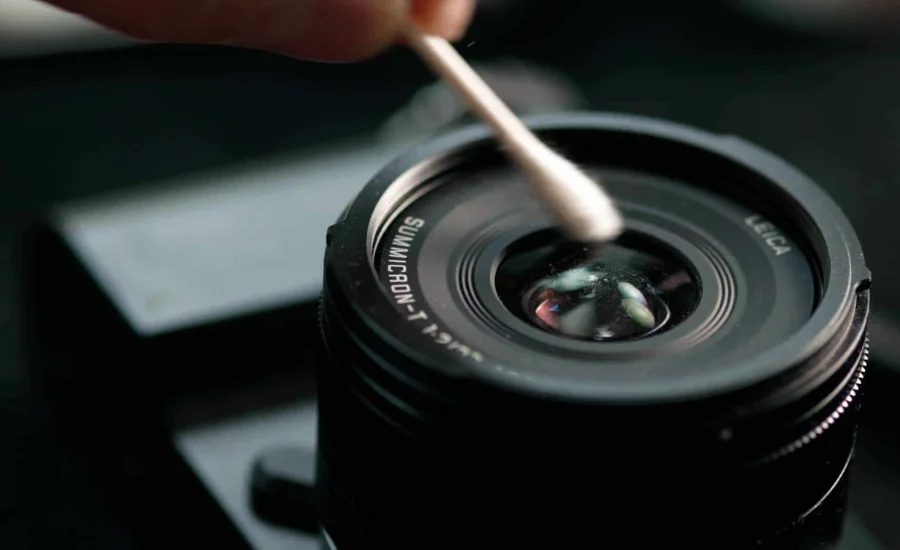
- Cotton swabs or artist brushes – For targeted cleaning of hard to reach areas like between lens elements. Use very gently and only on coatings if the manufacturer recommends.
- Lens cloth or papers – Damp cloth or special lens cleaning tissues/papers are used for a final wipe down. Avoid dry clothes which can potentially scratch.
Basic Lens Cleaning
Follow these steps for basic cleaning of external lens surfaces:
- Turn off the camera and remove any lens hood or filter before cleaning.
- Gently blow off any loose dirt or dust using short bursts of canned air held at least 6 inches from the lens.
- For stuck-on dirt or smudges, apply a small amount of the recommended cleaning solution to the cleaning cloth or tissue, not directly on the lens.
- Wipe the soiled lens area cleanly using a gentle, rubbing motion from the center outwards. Change areas of the cloth as it gets dirty.
- For fingerprint or greasy marks, dip the edge of a lens tissue in the cleaning solution and gently wipe prints away without scrubbing.
- Dry the lens using another clean area of the lens cloth or tissue to prevent water spots from forming.
- Ensure no stray fibers or debris remain before replacing any protective hood or filter.
Cleaning Internal Lenses
For multielement camera lenses with internal elements that are accessible, you may need to carefully clean the inside as well:
- Follow the basic cleaning steps above to clean external elements first.
- Consult your lens manual for instructions on safely accessing internal optics. On some lenses, you may need to remove outer barrels or front lens groups.
- Use a lens blower or compressed air to gently blow away loose dirt between internal elements.
- If a smudge remains, apply the solution to a cotton swab or artist brush and remove any marks by carefully wiping just the surface.
- Replace all lens elements and barrels in the correct order, being careful not to disturb the alignment.
- Avoid using compressed air or liquids on inaccessible internal lenses as it could damage the camera.
Cleaning Tips and Tricks
- Clean lenses gently in a well-lit area using subdued light to easily spot any remaining debris.
- Avoid touching lens surfaces as much as possible and always wipe in a straight line rather than circular motions.
- Lift, don’t scrub any particles embedded in coatings which could potentially scratch the surface.
- Periodically wipe down the camera body to keep it free of particles that could transfer to lenses during changes.
- Store lenses in caps when not in use or use lens hoods for added protection from dust and accidental bumps.
- Keep extra cleaning supplies handy for periodic touch-ups in the field.
- Consider an optional professional “deep cleaning” every few years for heavy-duty build-up.
With the proper cleaning solutions and techniques outlined here, you can keep your valuable camera lenses looking their best and capturing premium image quality for many years to come. Just be very gentle and avoid attempting to clean internal optics unless specified by your lens manufacturer. Regular cleaning is an important part of basic camera maintenance.
Special Considerations for Different Lens Types
While the general cleaning process is the same, some lens categories require special care:
1. Mirrorless Lenses – Be extra gentle with mirrorless lenses which tend to feature more compact internal constructions. Avoid pressing too firmly when wiping.
2. Telephoto Lenses – Cleaning long telephotos poses challenges due to their size. Use extended cotton swabs or artist brushes to access hard-to-reach rearmost optical elements.
3. Macro Lenses – Macro lenses demand even gentler cleaning as optical elements are closer together. Also, be wary of debris getting trapped between glass.
4. Wide Angle Lenses – Wide-angle optics typically have curved front elements that are more fragile. Press as lightly as possible when wiping curved surfaces.
5. Zoom Lenses – Zoom units have extra internal moving groups that can collect debris. Use compressed air or swabs to access all movable parts.
6. Internal Focus Lenses – These have nested optical groups that translate instead of rotating during focusing. Consult the manual for proper cleaning and reassembly procedures.
7. Vintage Lenses – Handle old lenses with extra care as coatings may be more delicate. Use only recommended cleaning solutions and do minimal wiping if possible.
8. Tamron/Sigma Third Party Lenses – Refer to manufacturer instructions as some optical designs differ from camera brand OEM lenses.
Tips for Specific Lens Surfaces
1. Front/Rear Elements – Gently wipe using circular motions from the center out. Examine for spots under magnification before replacing caps/hoods.
2. Filter Threads – Clean threads using a lens brush or cotton swab dipped in solution to avoid dust being trapped on rear lens caps.
3. Lens Signatures – Moisten cloth and carefully lift debris nestled in engraved letters and numbers that are hard to clean.
4. Focus/Zoom Rings – Wipe down rings and flushed surfaces to remove skin oils that could attract dirt.
5. Contacts/Connections – Blow and wipe contacts for caps, lens mounts and electrical connections to keep communications clean.
Deep Cleaning Your Most Used Lenses
More heavily used prime lenses that get swapped in and out a lot tend to accumulate grime deep in hard-to-clean areas over time. For these optics, consider periodic deep cleaning:
- Completely dismantle the lens removing all lens elements/groups according to the manual.
- Soak dirty glass/plastic in a solution bath (never immerse metal or electrical components).
- Scrub individual elements with a soft brush as needed, rinsing well between.
- Wipe down internal barrels, contacts and focusing mechanisms.
- Reassemble with clean cloths or compressed air to ensure particles aren’t lodged anywhere.
This deeper process may require expertise and is not recommended for complex zoom lenses. Consider a service center for deep cleaning to avoid possible alignment issues. Mark your calendar every 1-2 years depending on lens use.
Avoiding Cleaning Damages
No matter how careful you are, accidents can sometimes happen when lens cleaning. Here are some potential risks and how to minimize them:
- Scratches from sand/debris embedded in cloths can mar coatings and glass. Inspect materials closely before use and replace worn ones.
- Wet elements can become misaligned if bumped. Thoroughly dry before carefully reassembling any dismantled lenses.
- Too much moisture trapped inside fogging elements is possible if over-cleaned. Gently blot or blow excess moisture out.
- Chemical damage from overly aggressive or improper solutions. Always test cleaners on an inconspicuous lens area first.
- Static charges build up when wiping that can attract new dust. Consider a humidifier or anti-static products in very dry environments.
If damage does occur, consider a specialist repair service. Proper tools and safe handling techniques can help you avoid these issues and keep lenses pristine. Always respect your optics when cleaning.
With regular cleaning and a bit of care, your camera lenses will continue serving you well for many photography sessions to come. Proper maintenance is an important part of getting the most out of your optical investments.
Conclusion
In conclusion, by investing some time in regular cleaning and using the proper tools and techniques, you can ensure your camera lenses stay clear of debris that can negatively impact image quality. Following the best practices outlined here will help protect sensitive coatings and optics from potential scratches or watermarks.
Most importantly, always clean lenses gently and avoid attempting repairs or deep cleaning unless necessary. With proper lens care, your equipment can produce crisp photos for many more years of creative use. Keep those optics pristine!